
So there was I, a couple of weeks ago, supping on a fragrant glass of merlot thinking “I should really learn a bit more about wine given I get through so much of it”.
“Only one way to do that” says I, and that is to get organised and drink more wine (OK, two ways), so to that end I built a wine rack…seemed sensible.
The Problem
See, what I tend to do is buy a box of red and a box of white and the bottles just sit in the box and when it gets low I think about buying another box. The whites are nearly always Malborough sauvignon blanc and the reds merlot – why? Because these are the safe call in a complicated and dangerous wine jungle. They are fairly cheap and even if you get a very average one they’re still eminently drinkable. But it’s time to don the pith helmet, pull on the khaki shorts, load up the rifle and shoot the shit out of this jungle…or at least gingerly explore a little.
The Solution
Necking wine
So the first thing to do is get organised. If I had a wine rack, I could fill it with a couple of boxes of wine and as I drank part way through them, I can restock and enforce variety, but more than that, be able to compare more easily, save the better ones for special occasions, quaff the quaffing ones, perhaps splash out on a few more expensive bottles every now and again and keep to one side, maybe even allow some to age a little. Granted, you could do this with boxes, but it all just ends up being a bit of a lucky dip, so a wine rack it is. Oh…seems they’re surprisingly expensive – maybe I’ll make one.
It seems these days that any decent homemade furnishing project incorporates a wooden pallet at some point. And why not? Free wood that is already hammered into an approximation of the shape you want…bosch! I quite like the wine racks that hold the neck of the bottle rather than the body, and I started thinking about those single bottle holders that are just a small plank with a hole in that balance a bottle of wine by the neck. Could you do that with 40 bottles of wine? Seems dangerous, but I guess you can always build feet or lean it against a wall if it doesn’t balance.
The Skill Set
Let me state at this point that I am by no means a carpenter, I have made a few things like my coffee table and side tables as well as a couple of herb planters, but I just make it up as I go along, use cheap wood and hope that it ends up looking rustic instead of shit. I’ve been doing this because I’m a cheapskate and don’t want to pay a fortune for a coffee table that I could make myself, and it turns out I can…just about.
One thing these few experimentations have taught me is you should have a clear idea of what you want to do. Think about it. Sometimes I roughly sketch it too, but mostly I just think about it in idle moments, turn it around in my brain, try and picture what I want it to look like, but more importantly how it will fit together – how will I attach that bit to that bit strongly enough that I don’t end up with glass and wine all over my floor?
The second, and perhaps slightly contradictory thing it’s taught me is you have to adapt your design as you go – no matter how clear your idea is, you won’t have thought of everything, the wood is never as straight as you think it’s going to be, you suddenly realise “oh yeah, that’ll never work”, or ” it would actually look much better/be much easier if I do it like this”, etc. That’s what I love about making things like this – the process of figuring things out along the way – the little puzzles that present themselves, the little problems to overcome – they all make it good fun and as long as you tackle them well and don’t get too pissed off, the end result is often better than the original plan. Some small gems of wisdom here:
- Be flexible;
- Follow the easiest route where possible, but not at the expense of what you really want to end up with;
- Be innovative and practical, and think outside the box – my old man is great at this (it’s amazing what he can make out of a coat hanger!) and it incorporates the above two points;
- When you get to a crossroads or come across a problem: Stop! Have a ciggie, take a break, and just sit with it for a while – solutions will present themselves whilst forging on could ruin everything;
- Most important of all, if possible, build it with someone else who is interested and engaged – a second pair of eyes is worth so much. If you can’t recruit a helper, and you get stuck, just grab a mate and show them the problem and explain it – more than likely, by explaining it out loud you will answer your own questions.
Aaaaaaanyway…
The Ingredients
- A pallet
- A claw hammer (or crow bar)
- A drill
- A drill bit for making the bottle holes (more on that later, but I used 3.2mm round saw bit)
- Screws
- A saw
The pallet

The pallet
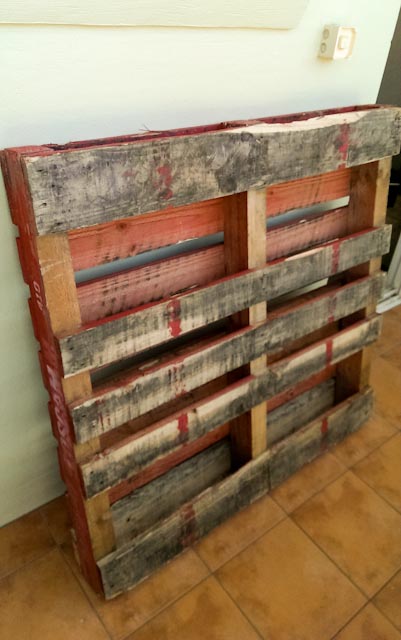
The pallet’s backside
The all important pallet. It’s amazing how different pallets are – not just colour and condition, but shapes and sizes, materials, etc. We went to the pick up area of a department store and asked the guy if we could have a pallet, he said no worries, and we spent the next hour discussing the pros and cons of each one because there was such a variety. We saw some perfect pallets in bunnings – brand new, bare wood, immaculate condition, a cool stamp down the side, beautifully shaped main beams, but they had half a ton of bricks on them and bunnings refused to let ANY of their pallets go anyway. So basically have a look around and choose wisely. We got a red beast that was a bit shabby chic around the edges, but big and strong. Big and strong is not necessarily a good thing when you’re trying to pull it apart though (as you’ll see), but at the minimum make sure it is real wood and not compressed rubbish.
The Process
As mentioned, it starts in your head before you get any tools out, and what’s in my head may well be different to what’s in yours, so these are just my thoughts and what I did. My initial idea was just to take off all the extraneous wood from the back of the pallet, saw the pallet in half on one side of the middle strut and have a wine rack half the size of what I have now. However the full size fits nicely in a space we have and besides…why do things, quite literally, by halves? I also wanted a little ledge at the back above the top wine bottles to put spirits on – this changed too.

The pallet with its backside whipped
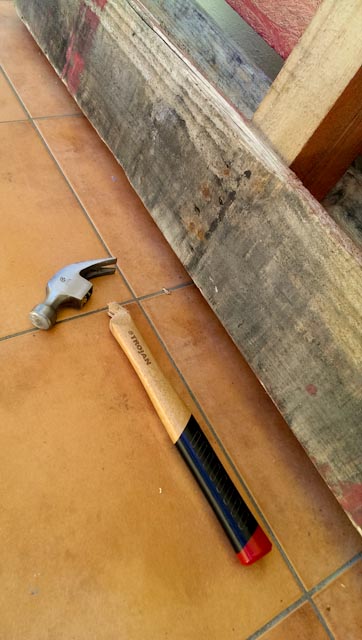
Chocolate hammer
So step 1 was to take off the unnecessary planks at the back and try keep them whole so they can be reused later. As mentioned, we got a tough old pallet and the six inch nails were well and truly rusted in, so not much of that wood survived intact…and neither did my hammer. So a quick trip to the hardware store, a surprising amount of swearing and huffing and puffing and sweat and more swearing and the planks were off. Now, had I thought about it a bit more (and I thought about it a lot!), I would have realised I should have left one of the back planks on to hold the spirit bottles in at the back. Ah well, by no means a disaster.

The leaning pallet
We then sawed the legs off at the angle we wanted the pallet to stand at. Fairly important bit this – if there isn’t enough angle, your wine rack will fall over and you will be a lot of wine the poorer for it. Disregarding the importance of this step, we unscientifically guesstimated that if we wanted to keep our wine in one piece, we would have to have the center of gravity of the middle row of bottles mostly behind the leading edge of the foot and this would ensure that the rows above were behind the foot, counter-balancing the rows below. The center of gravity of a bottle on its side is pretty muchly half way along the fat bit, so we stuck some bottles in the gaps between the slats, estimated the lean and cut the top and bottom off at that angle.
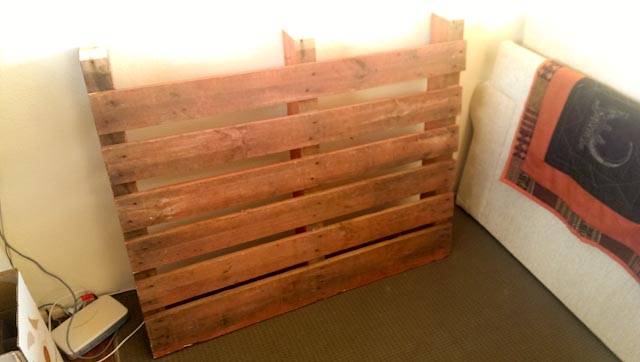
The pallet in situ
At this point we ran out of time for the day and had to give up, so we put the pallet in place where we envisaged it living and left it there till the following weekend. This was a surprisingly cunning idea as it meant we could live with what it looked like and how it fit in. We decided to take that bottom plank off for a start, but then the genius inside us started to come out and there was a large amount of discussion as to the top of the wine rack – I was after a fully integrated booze system with the spirit bottles (or wine glasses) half hidden on a small ledge inside the rack, whilst my better half envisaged a shelf at the top with trailing plants to look all vineyard-y. I liked the sound of that but we obviously couldn’t have both, however after a lot of chat, we worked out a way we could. If the shelf opened, the spirits could be housed right down inside the pallet – same thing as I wanted but they were just further down…ah, the importance of having someone to talk to with these projects!

Live fast die young
Now to the holes – another important juncture! You have to have the right combination of hole size and hole angle and this is definitely worth a practice on a spare plank. I measured the necks of the bottles and thought a 3.5-4mm hole would be about right, and ended up buying a drill bit that is basically a circle of saw teeth. There was a 3.8mm version and a 3.2mm version – I reckoned the larger one would do us right, but actually found the smaller one was perfect, but you need to experiment and see what works – you don’t want your bottles to be too droopy or too erect. There’s also the job of spacing the holes correctly and marking out the centres so you have enough space for each bottle (I think we accounted for roughly 2cm between the fat ends). And then drill the holes – my drill just wasn’t up for it, deciding the adage “live fast die young” was its new motto…another trip to the hardware store!

Spirits rack
The shelf for the spirits to sit on was pretty easy and we even went for a bit of recycling by using some of the hole cut outs to support it. Just remember to work out where it should go using your tallest bottle – if you’re wanting a shelf at the top, your tallest bottle needs to sit below that…obviously.

The secret door
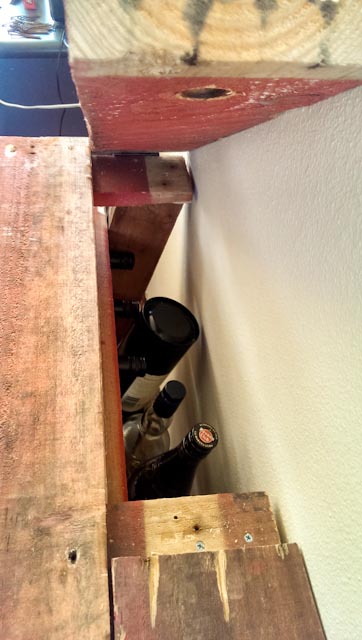
The secret stash
Now for the top shelf…that went through a LOT of iterations in the thought process. It seemed best at two planks deep, but there’s nothing for the outer plank to sit on, so it has to be connected to the rack somehow, but the back plank has to be able to open as well, and that throws up a fair few considerations…I won’t go through them all, suffice to say we got there in the end with a little ingenuity and a lot of chat.
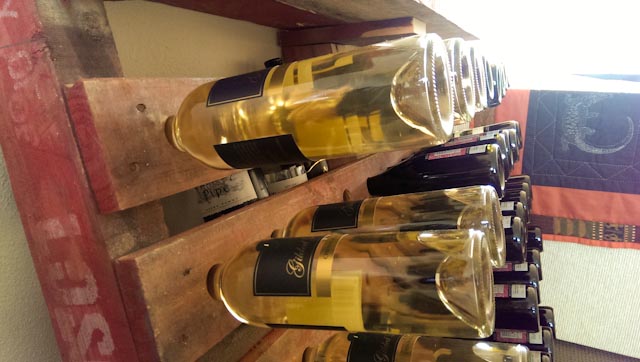
And that’s pretty muchly it – a 50 bottle wine rack, with integrated spirits counter and trailing plants (that aren’t trailing yet) made for the price of a few screws (and a hammer and a drill), but a big smile on my chubby proud cheeks! Might reward myself with a nice cold beer.
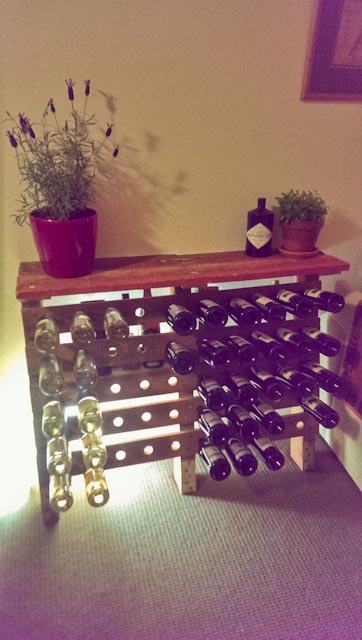
Sexy rack
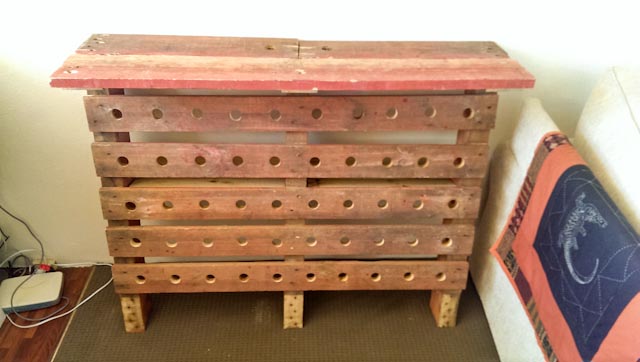
Naked rack
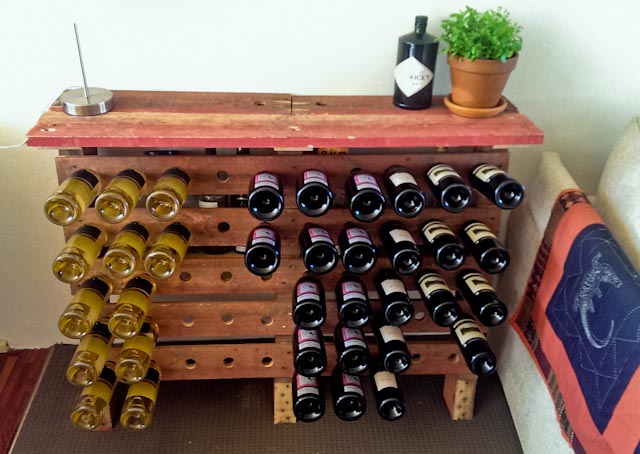
Clothed rack

nice rack indeed Phats. Love the lighting behind it. Creative and cheap *tips cap*
LikeLiked by 1 person
With the emphasis squarely on the ‘cheap’. Phatty, you’re tighter than a gnat’s chuff, I swear ;o)
LikeLiked by 1 person
Very enterprising. Why do yo only have a door on one side? If you have another door you could keep a load of glasses on the right side.
Well worth the cost of the drill, hammer and a few screws.
LikeLike
Oh don’t you worry pap, there’s a door on both sides. No room for glasses though, all spirits 😉
LikeLike